
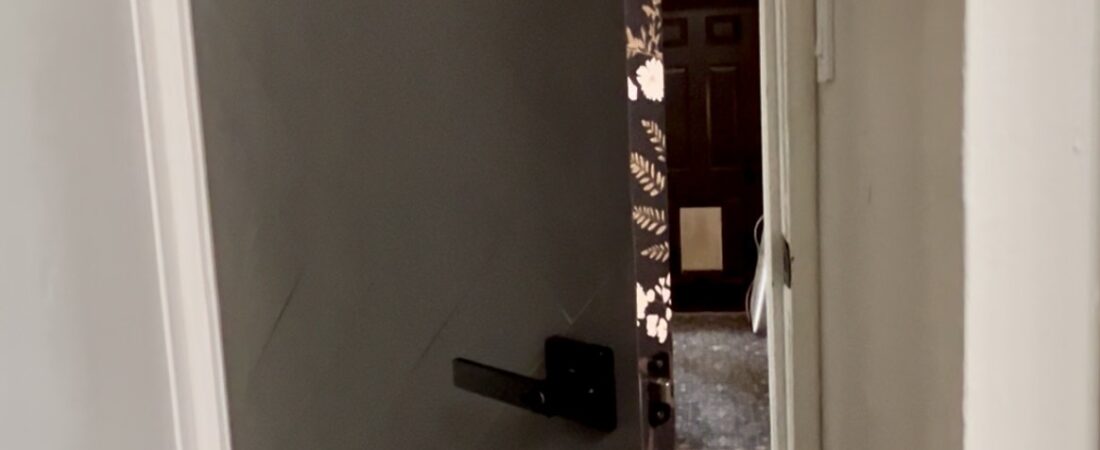
Sometimes the projects that make the biggest difference are the ones you already have sitting in your house.
This door was completely functional, but visually? It was doing absolutely nothing for the space. Instead of replacing it with an expensive new door, I decided to see what I could do with the one I already had.
The plan was simple: add a geometric design to give the door some dimension, paint the entire thing a deep charcoal, swap in dark hardware, add some wallpaper to the edge, and hopefully end up with something that looked a whole lot more expensive than what I started with.
And it worked.
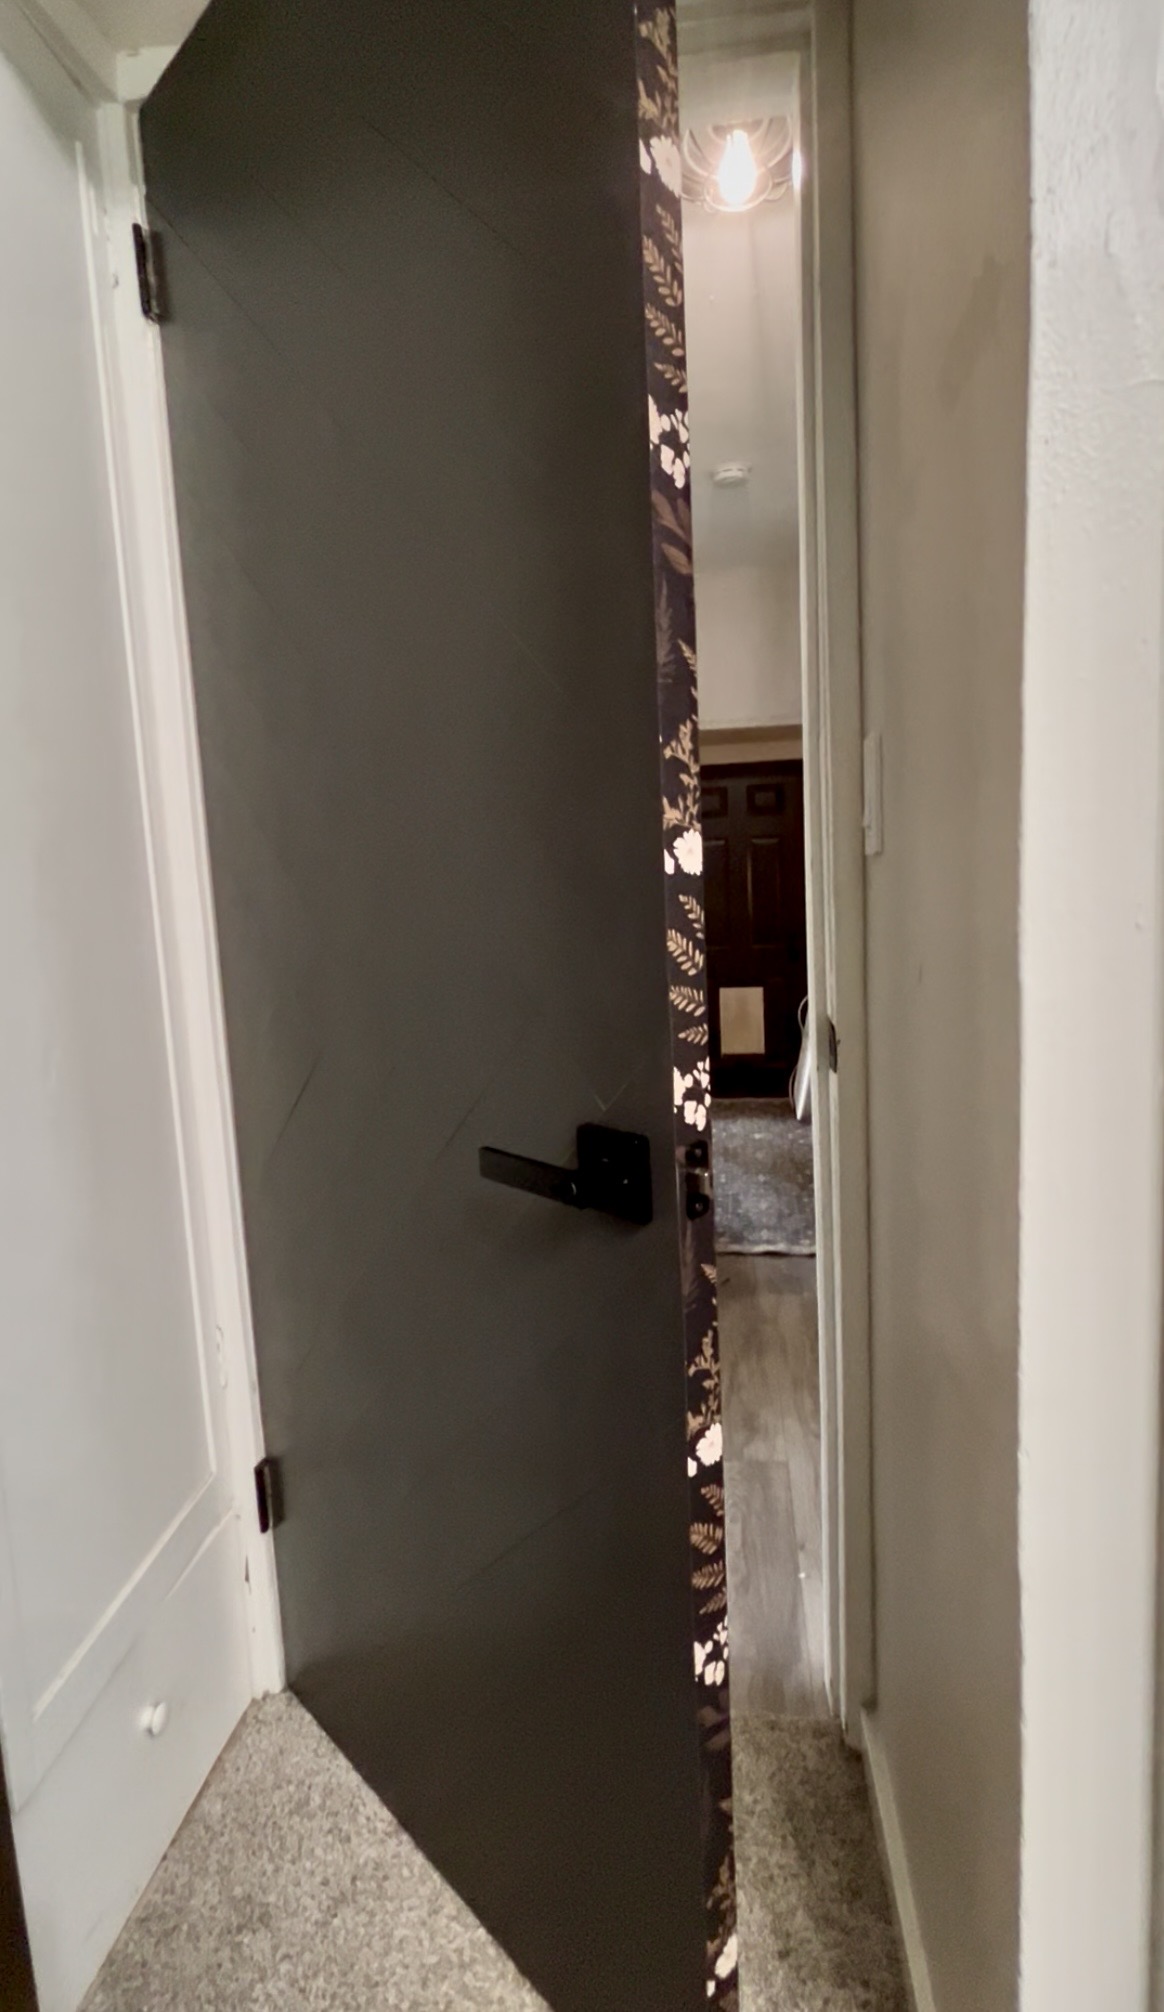
Here’s how I transformed a basic interior door into a custom statement door.
What I Used
For this project, you’ll need:
- An existing flat or mostly flat interior door
- Some tempered hardboard cut into thin strips
- Table saw
- Circular saw
- Tape measure
- Pencil
- Straightedge or level
- Wood glue
- Brad nailer and brad nails
- Spackling Compound
- Sandpaper or sanding sponge
- Primer
- Paint in the color of your choice – I used Iron Ore by Sherwin Williams
- Paint foam roller and a brush
- New door hardware, if desired
- Screwdrivers and/or an impact removing and installing hardware, as well as the door
- Wallpaper, if desired
You can absolutely change the paint color, wallpaper, or pattern on the door to fit your own house. The technique is what makes this project so customizable.
Step 1: Remove the Door and Hardware
I started by taking the door down so I could work on it flat.
Technically, you could probably attempt portions of this project with the door hanging, but working horizontally makes measuring, laying out the pattern, attaching the trim, filling holes, and painting much easier.
Remove the doorknob and any other hardware that will get in your way.
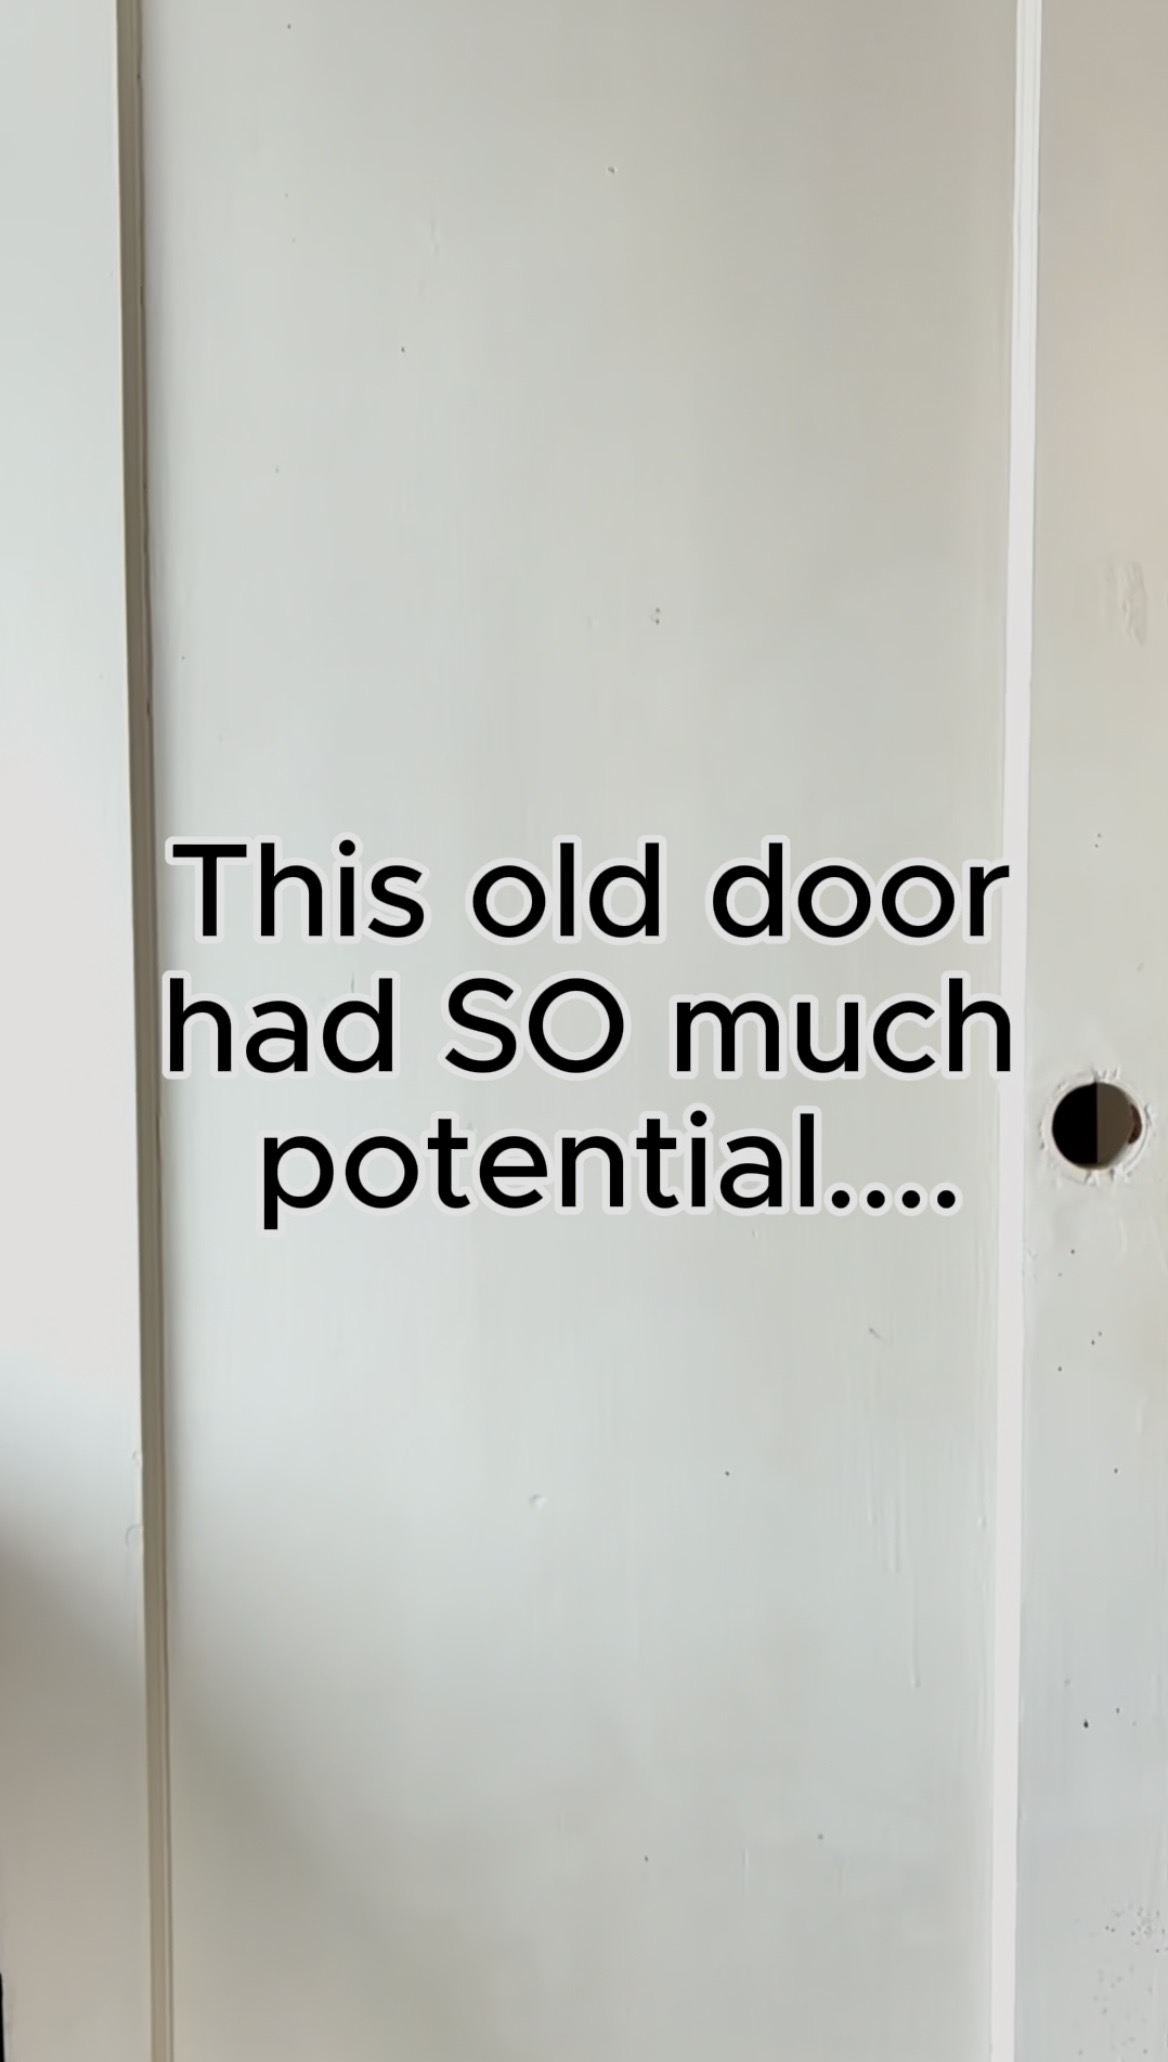
This is also a good time to clean the door really well. Adhesive doesn’t love years of dust, fingerprints, and whatever mysterious substance inevitably ends up on old doors.
Step 2: Plan the Geometric Pattern
This is the part that makes the entire project.
Instead of simply adding the strips horizontally, I wanted the door to have a geometric, herringbone-inspired design.
Before permanently attaching anything, I worked out the placement of the wood strips across the face of the door.
The important thing here is to measure and establish your pattern before you start cutting a million individual pieces.
I determined the length of the longest piece that I would need in my pattern so that I could batch cut a bunch of strips to this length and know that they all would be long enough. I also decided to start my design in the center of my door, kind of like a sideways triangle. So I measure to the halfway point, and then marked a 45 degree angle for my first piece. Once I got that established, I knew I could base everything else off of that starting piece.
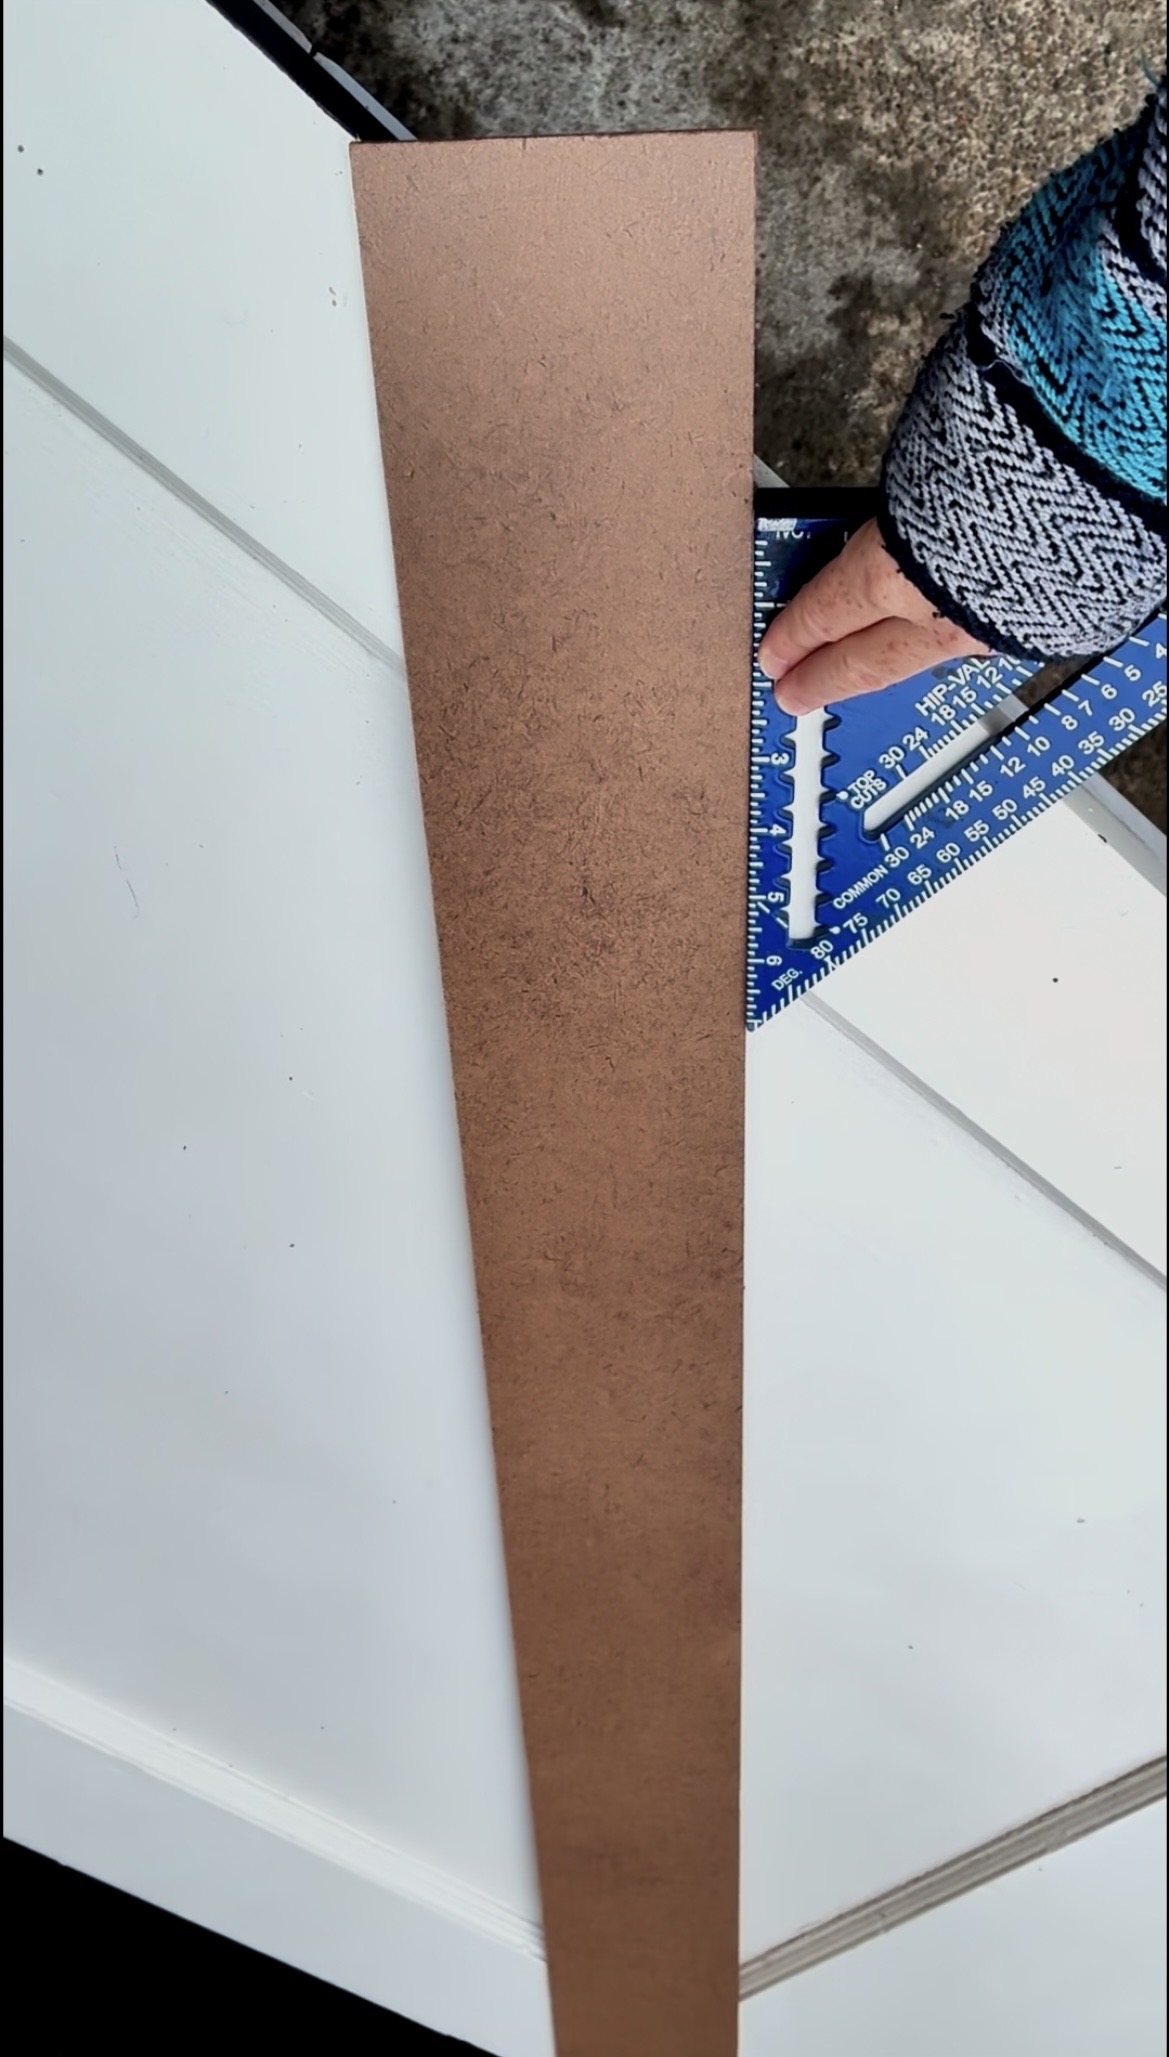
You don’t necessarily have to duplicate my exact layout. In fact, that’s one of my favorite things about this project — you can make the pattern as simple or complicated as you want.
A tip before you start cutting
Don’t assume every piece will be exactly the same length just because the pattern looks symmetrical.
Old doors aren’t always perfectly square, your first few pieces can slightly change the available space for the next ones, and tiny differences add up.
Measure the actual space before making your final cut. I am not providing precise measurement details in this article because my doorways are non-standard, and therefore wouldn’t help you plan yours.
Step 3: Cut the Hardboard Pieces
Once I had the design figured out, I started cutting the thin pieces that would create the pattern.
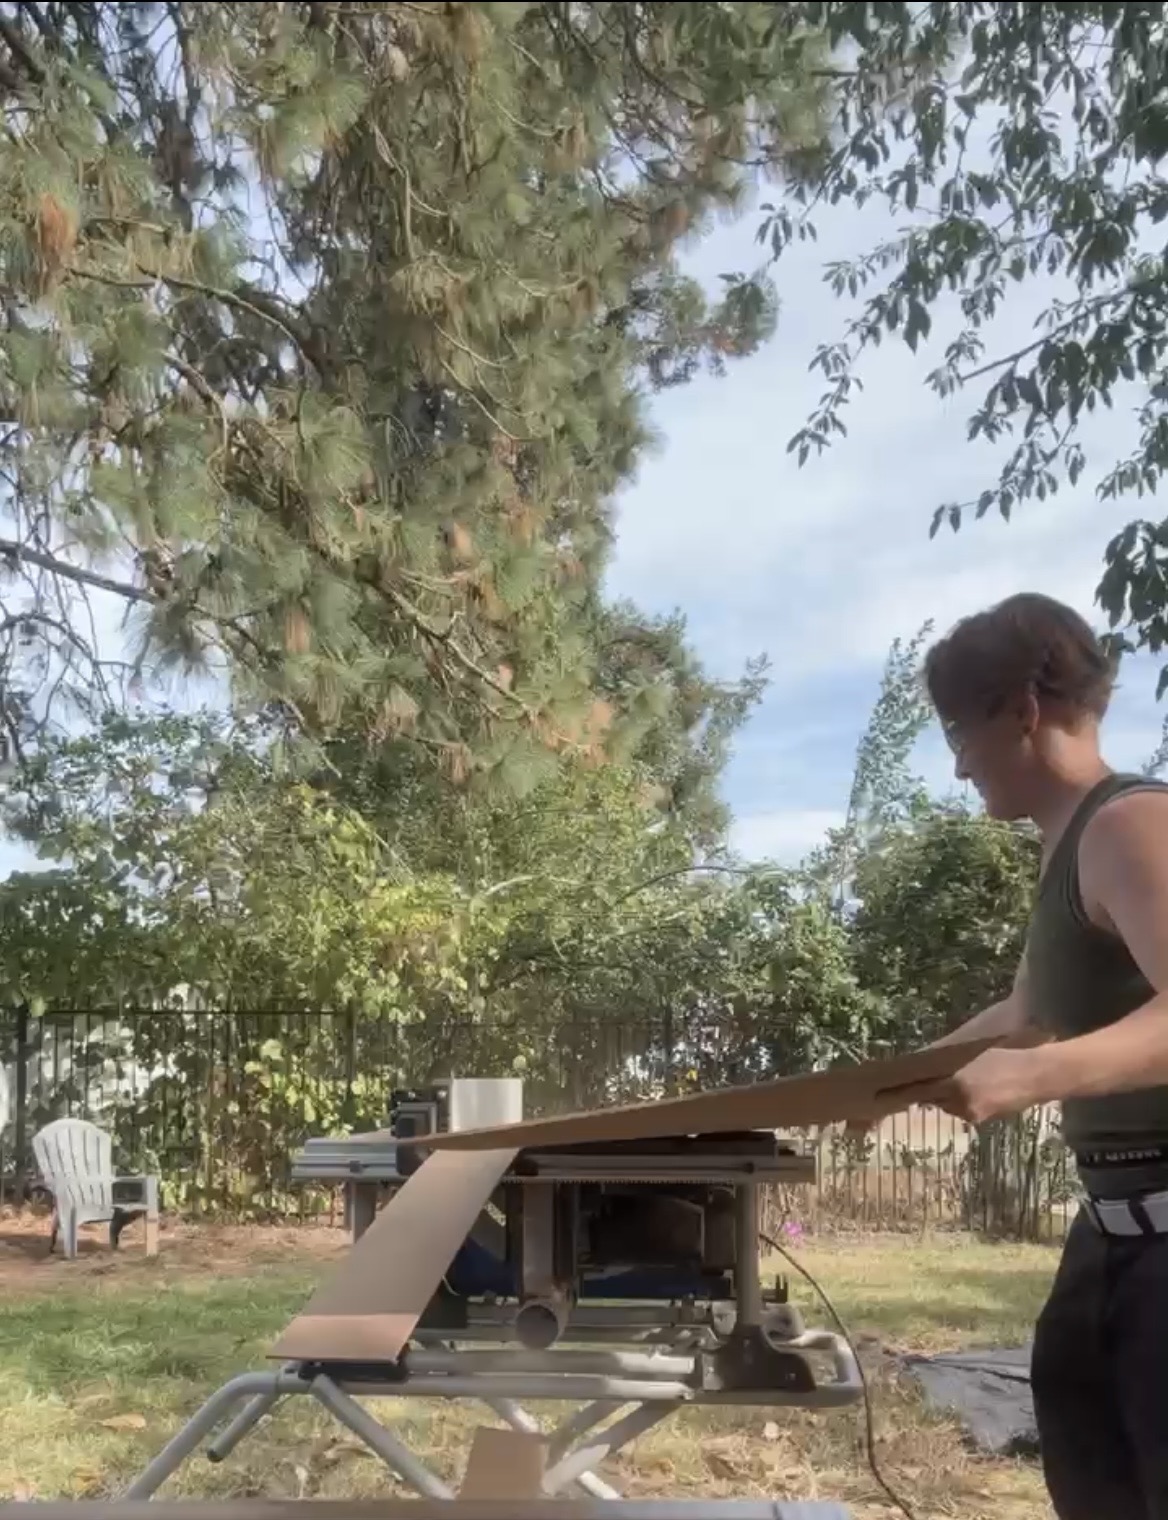
I decided to go with 4inch wide strips that I cut by feeding the 4×8 board through the table saw over and over again. Once you set your table saw to the desired thickness, you can batch cut all of your pieces to be exactly the same. It was a little bit cumbersome to feed the whole 4×8 board through the table saw while it was so big, so I ended up cutting mine in half first. This still worked with the measurements I had planned out, and it made feeding it through much easier.
Step 4: Attach the Design to the Door
My doors had a raised frame around the outside edges, and were beveled down in the middle, so I needed to add some support there to be able to attach my pieces to. I ended up having some scrap wood that was the right thickness to raise up this portion of the door to be level with the outside edges, so I nailed that on in a cross shape in the middle before I started attaching the hardboard strips.
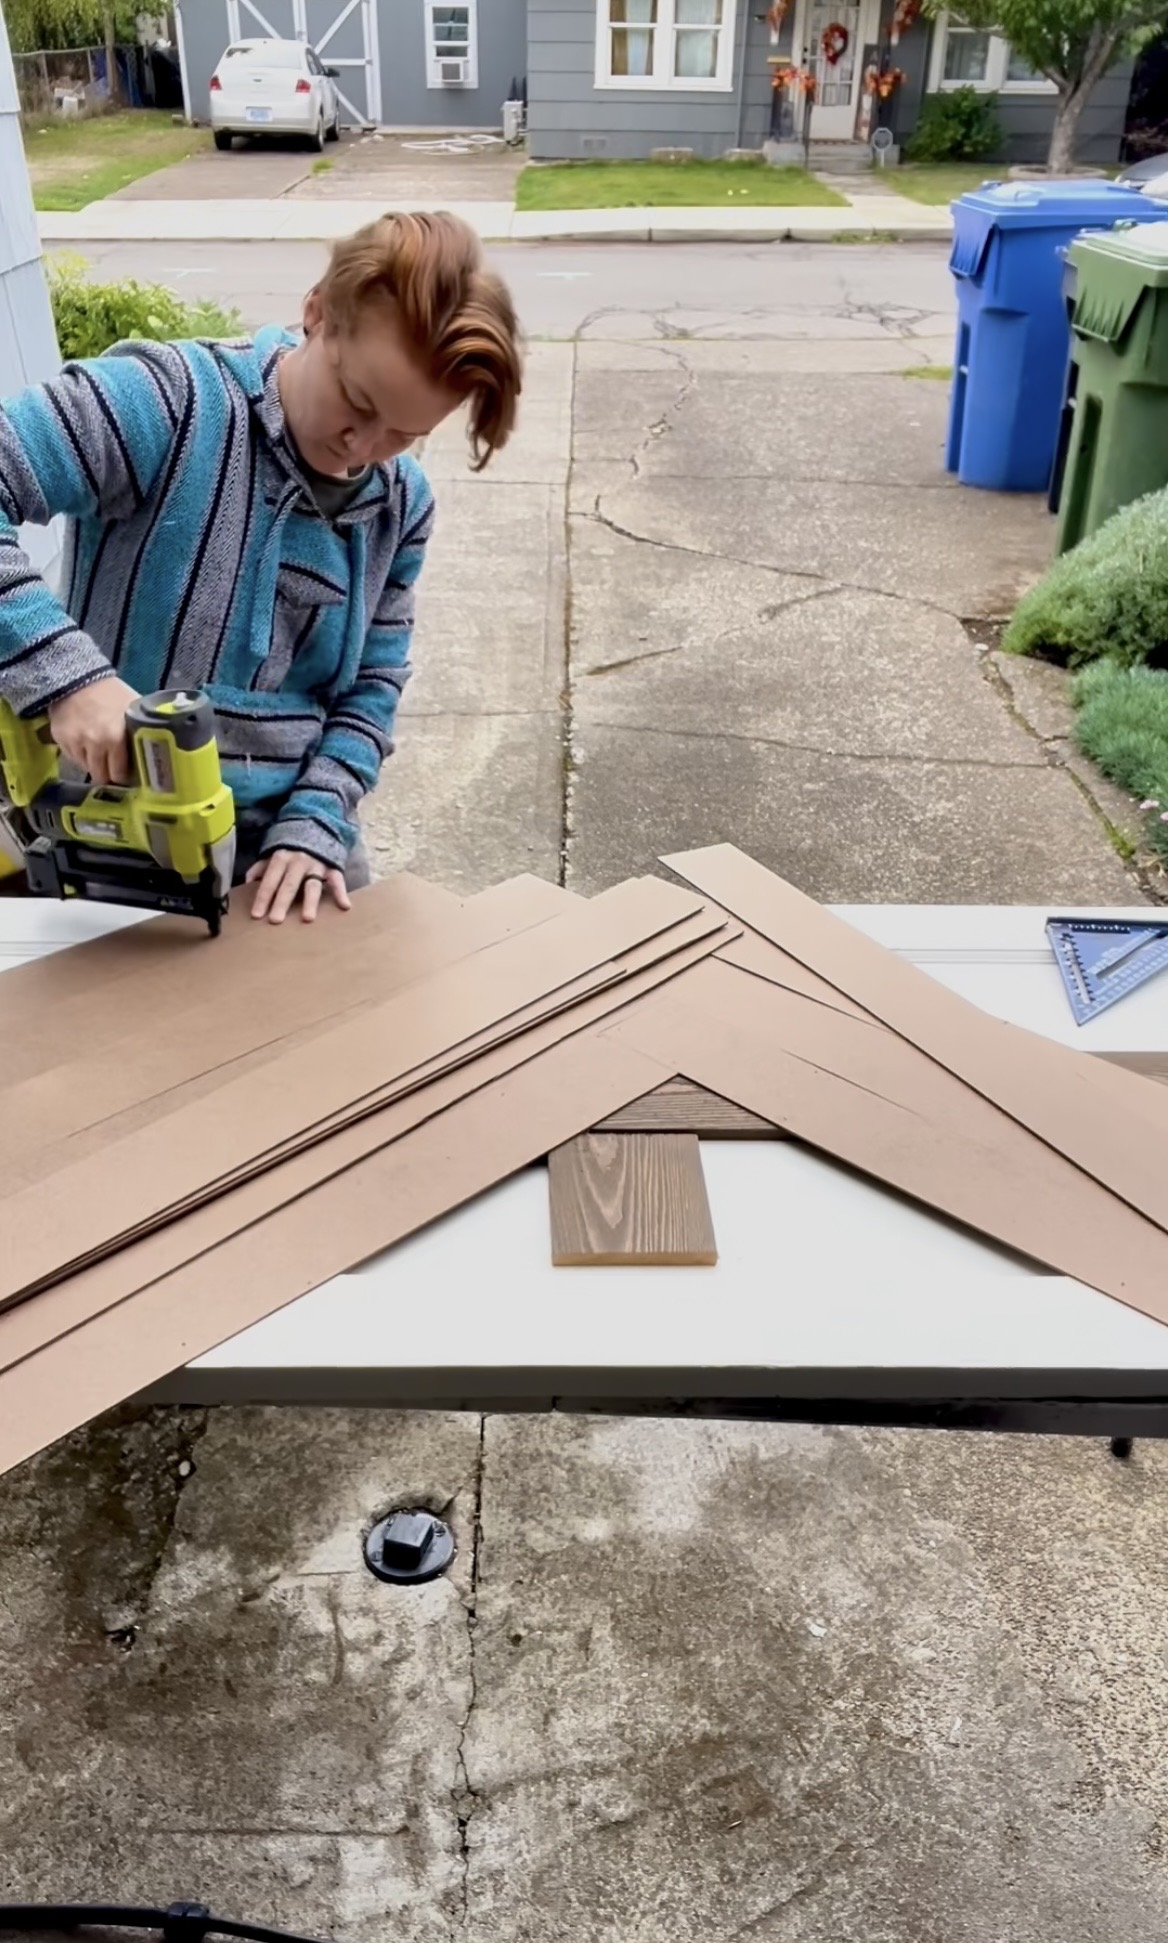
Once I was happy with the support I added in the middle, I set about establishing that first piece on a 45 degree angle. Since I was going to base the rest of the pattern off of this piece, I wanted to take the time to make sure I got the angle right. For every piece, I glued them down with wood glue, as well as nailed in several places with the brad nails. I wanted to be sure that they didn’t go anywhere before I had the chance to trim the excess!
Continue working through the pattern, checking your alignment as you go.
Step 5: Trim the Excess
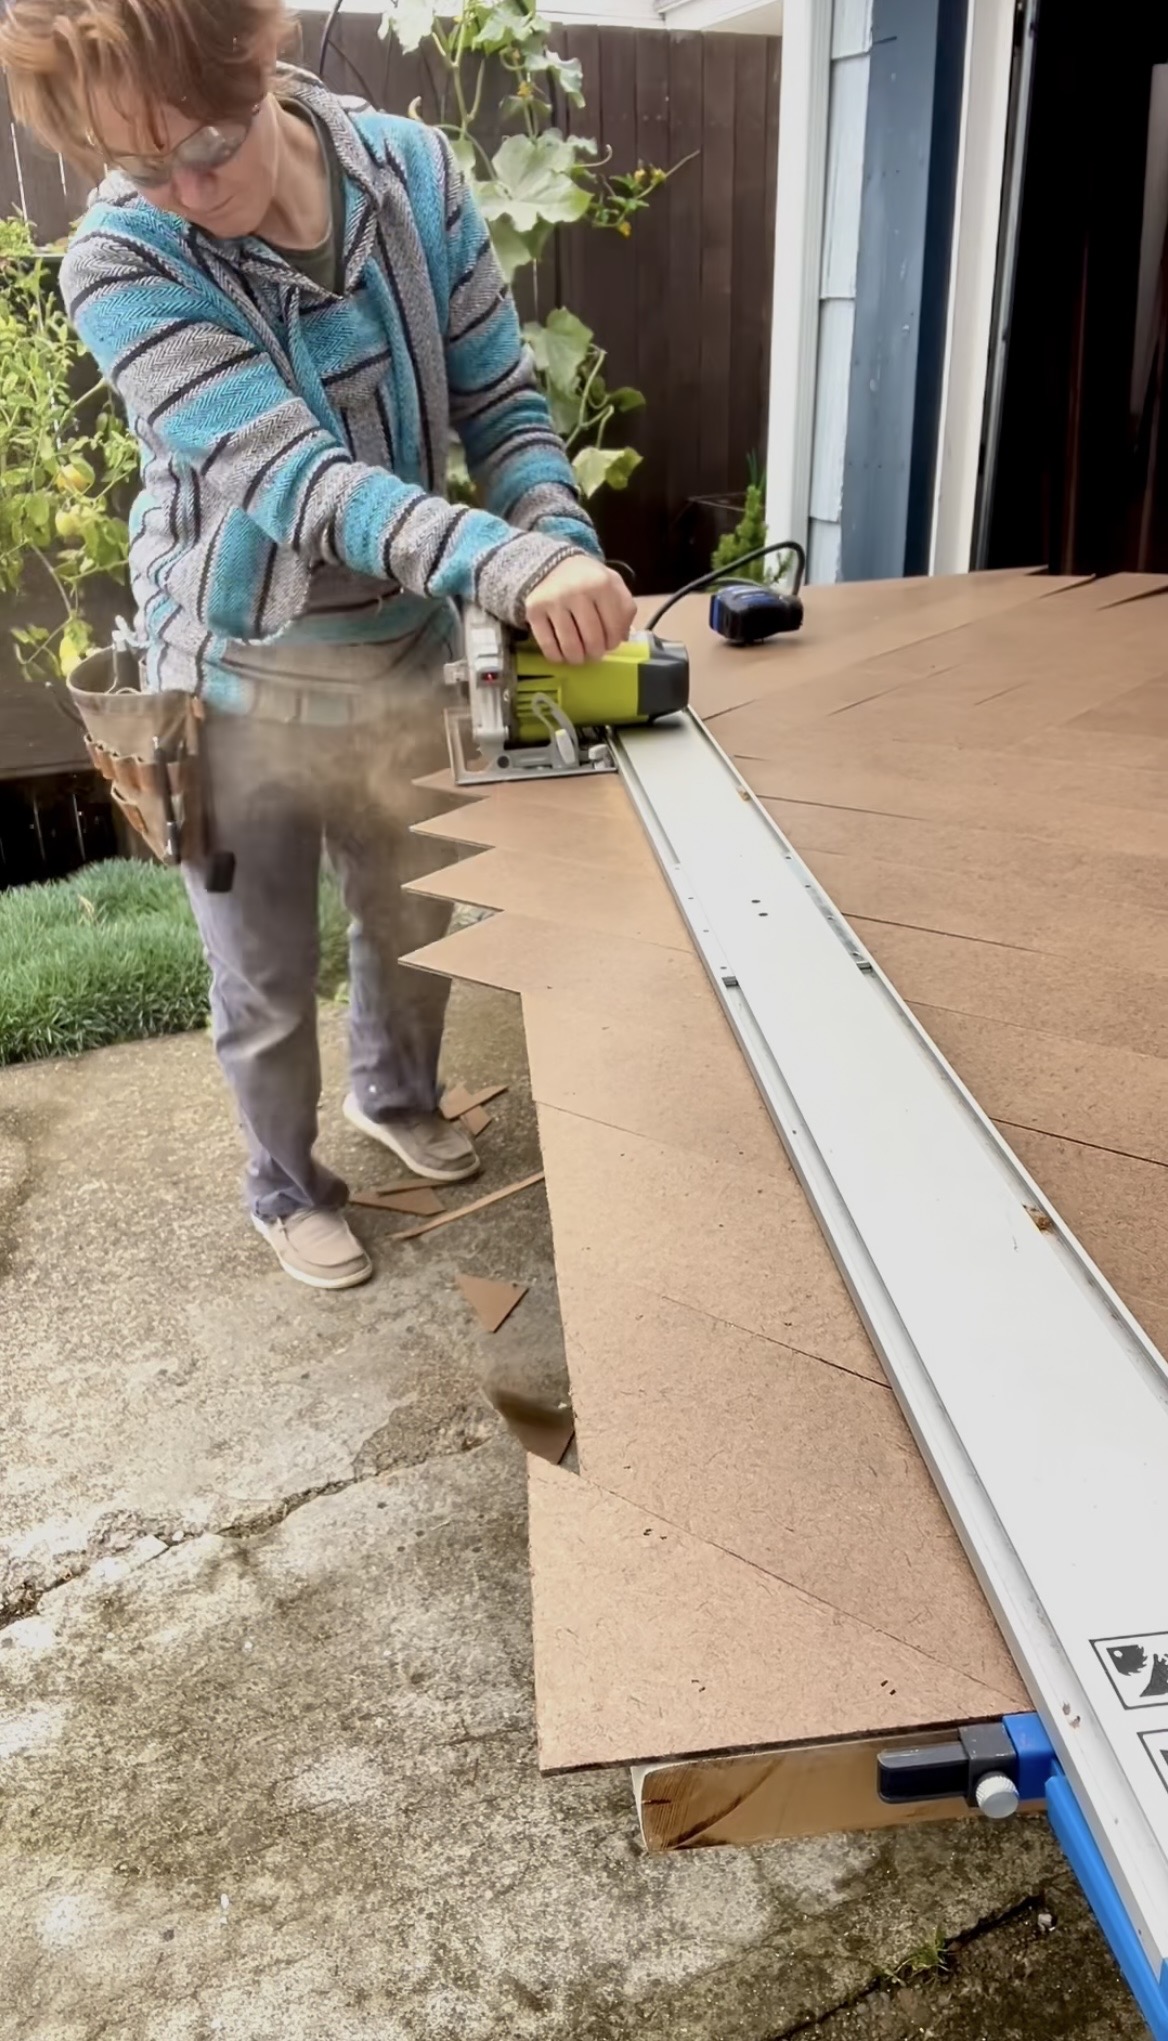
After attaching all of your slats, you will likely have excess hanging over the sides. I set up our Kreg straight edge guide to make sure I got a nice straight cut all the way down the side of the door. You could also clamp down a board as a guide if you didn’t have the Kreg tool. On the long sides, you are going to want to remove about an eighth of an inch off of the door from each side to make the door fit nicely back into it’s spot, since we are adding thickness.
Step 6: Fill the Nail Holes and Imperfections
Once all of the slats were attached, it was time for the least glamorous but extremely important part:
prep.
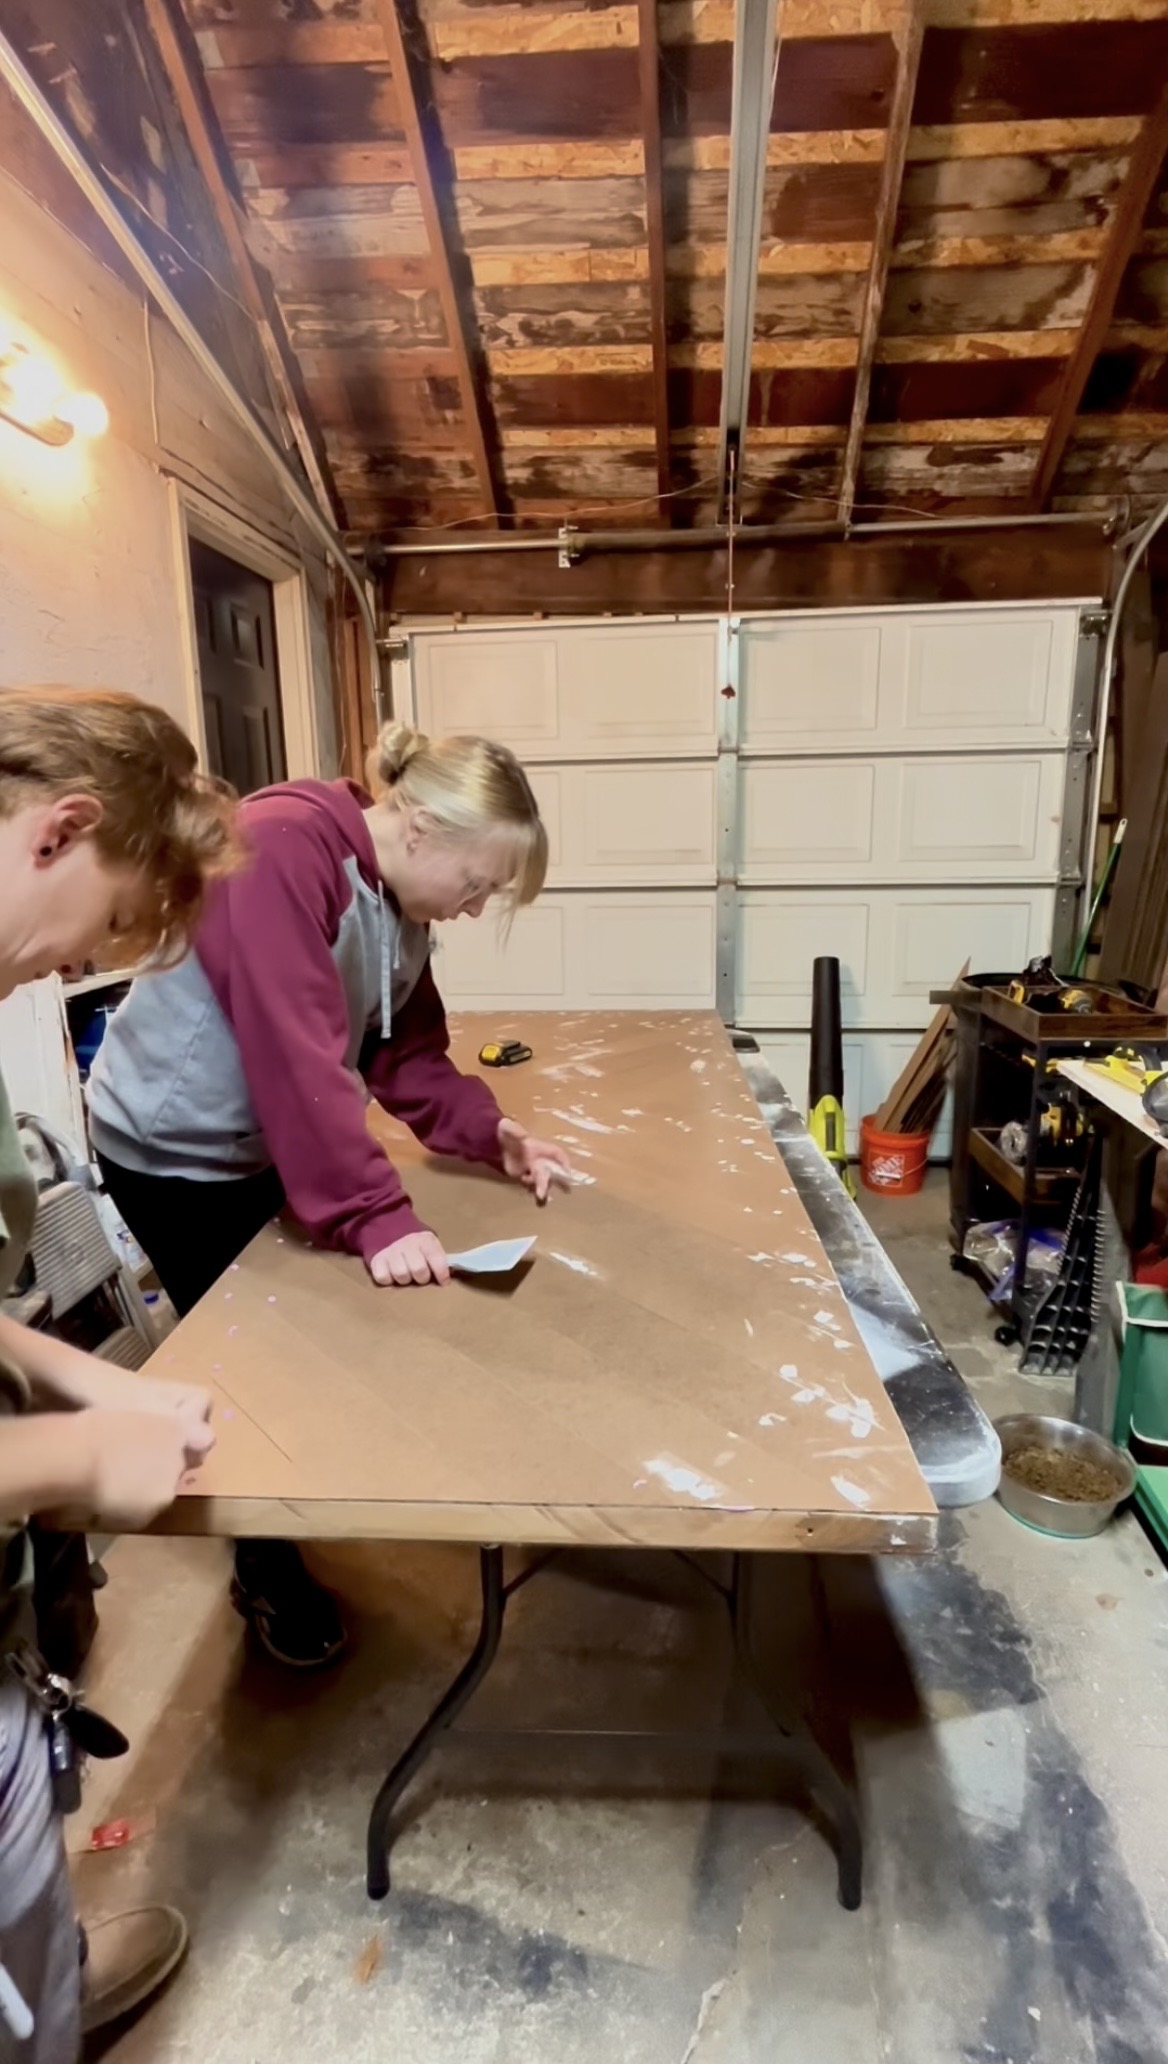
I filled the visible nail holes and any little imperfections that I didn’t want showing through the finished paint.
Don’t skip this because you’re using dark paint.
Dark paint is not magic. It will happily show everyone the nail hole you decided wasn’t worth filling. I actually did not do this as thoroughly as I should have the first time around and had to go back and sand through my first coat of paint to make sure there were no imperfections. If you can feel it with your fingers, you will see it through the paint. Sand down those nail holes until you can’t feel it anymore, and you may have to fill them twice if they don’t disappear the first time.
Let the filler dry according to the product directions between rounds, and take your time. It’s worth it to be thorough with this and it will save you the work of going back later.
Step 7: Sand Everything Smooth
After the filler dried, I sanded the repaired areas smooth and made sure there weren’t any rough edges or obvious transitions that would distract from the finished design. The edges of the hardboard strips can be a little rough or have a little texture, so it’s worth giving everything a once-over.
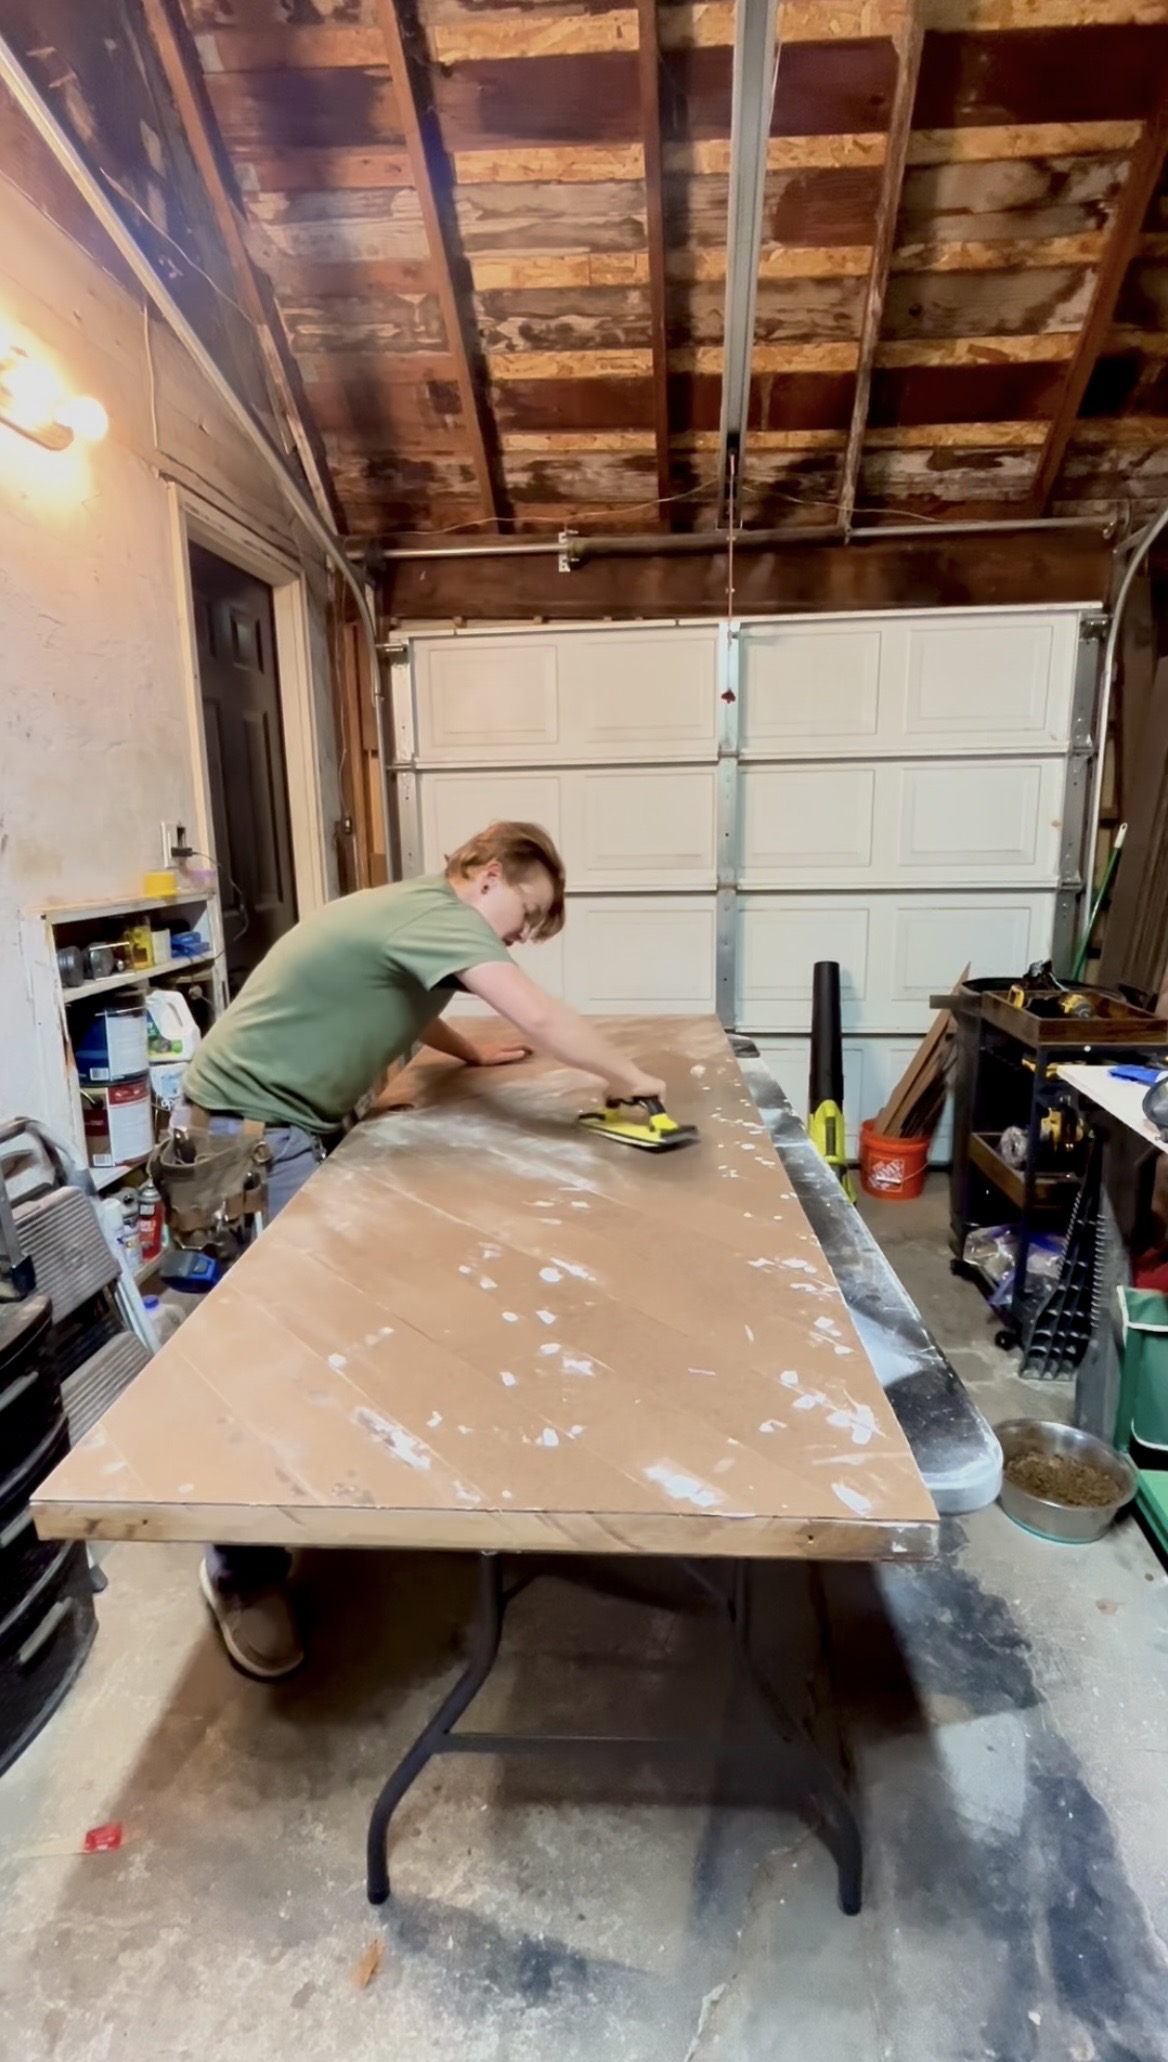
Run your hand over the surface after sanding.
Your fingers will often catch bumps, ridges, or rough spots that aren’t immediately obvious when you’re looking at the door.
Remove all of the sanding dust before moving on to paint.
Step 8: Paint the Door
And now for the part that changed everything. Paint!
First, we started with a coat of Zinsser primer, and then I painted the door Sherwin-Williams Iron Ore.
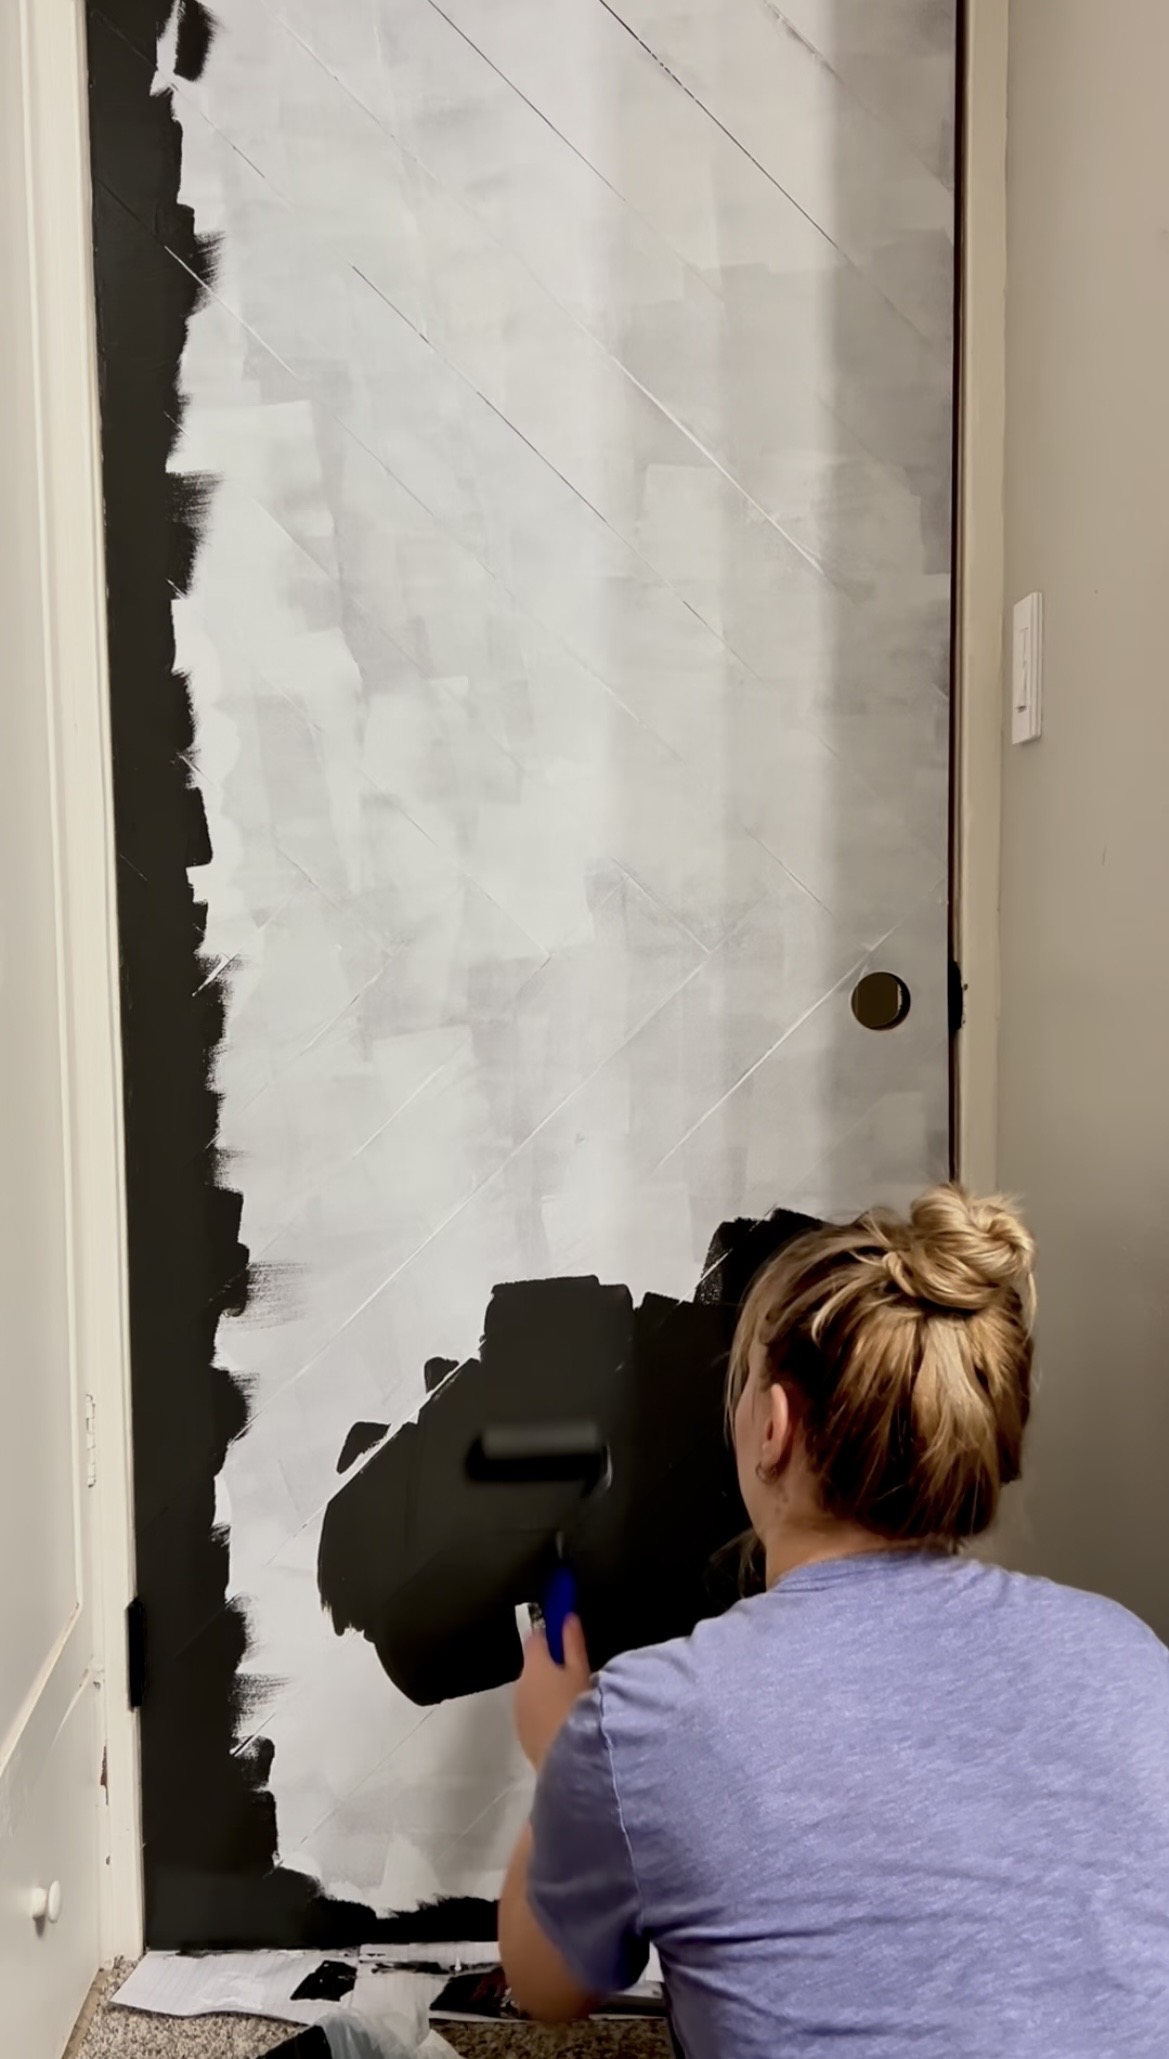
Iron Ore is a very deep charcoal that reads almost black without feeling quite as harsh as a true black. On this door, the dark color also helps all of those individual pieces visually become one cohesive architectural design.
Instead of looking like strips attached to an old door, the whole thing starts looking like one custom-built piece.
Apply thin, even coats and let each coat dry properly before recoating. We ended up doing 2 coats of Iron Ore.
Pay special attention around the edges of the raised wood pattern, where paint can collect.
After the paint was all dry, I opted to add wallpaper along the inner edge of the door, for a moody/floral finishing touch. This tied our doors together with the wallpapered accent wall in our house. This step is definitely optional, but I love how it tied together the end result.
Step 9: Reinstall the Hardware
Once the paint was fully dry, I reinstalled the door and added the dark hardware.
This is a relatively small detail, but it makes a huge difference.
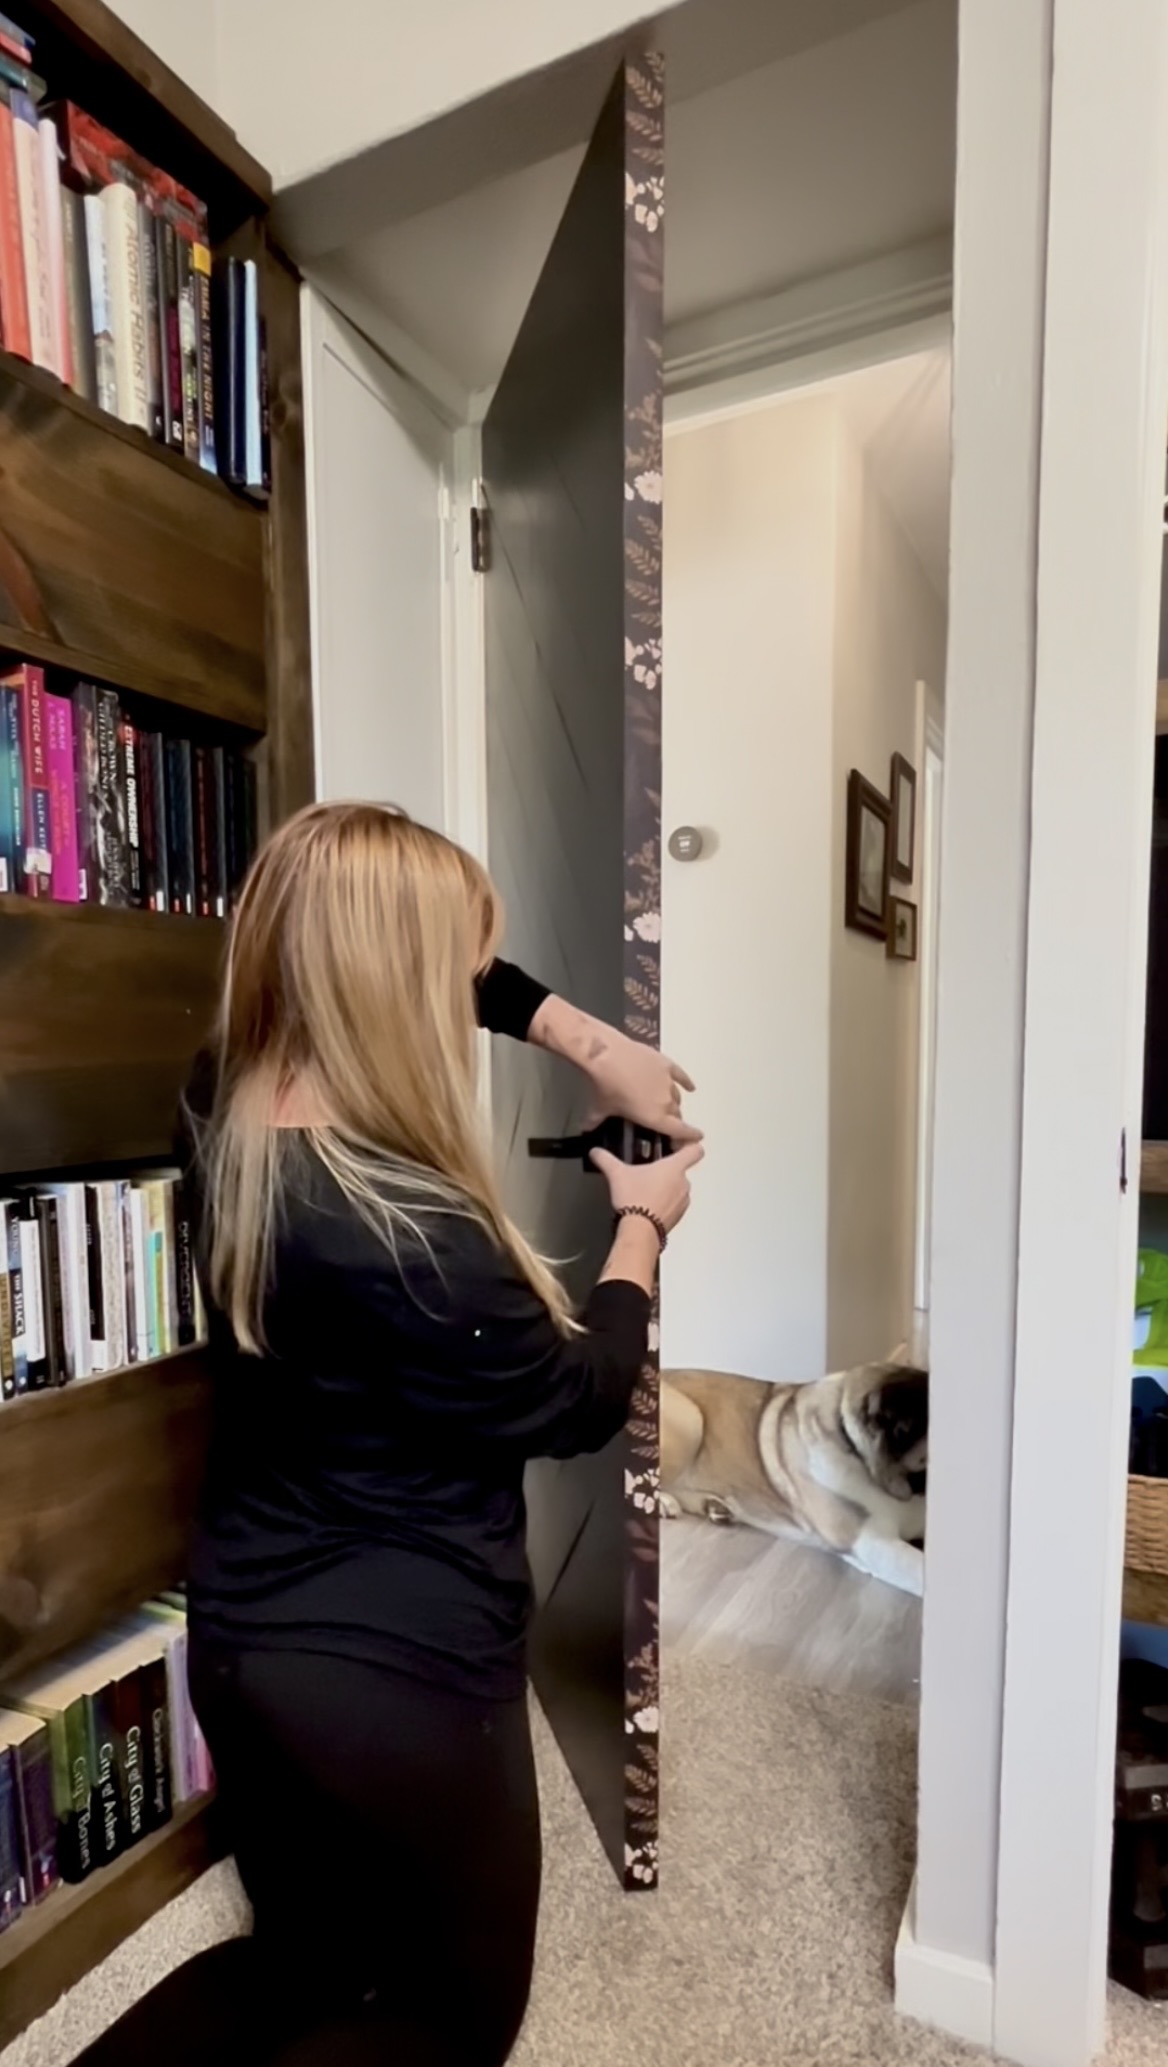
The dark hardware disappears into the Iron Ore instead of interrupting the design, which lets the texture of the door be the main focus.
The Finished Door
The difference between the original door and the finished one is honestly kind of ridiculous.
What started as a completely ordinary interior door now looks like a custom statement piece — without buying a custom door.
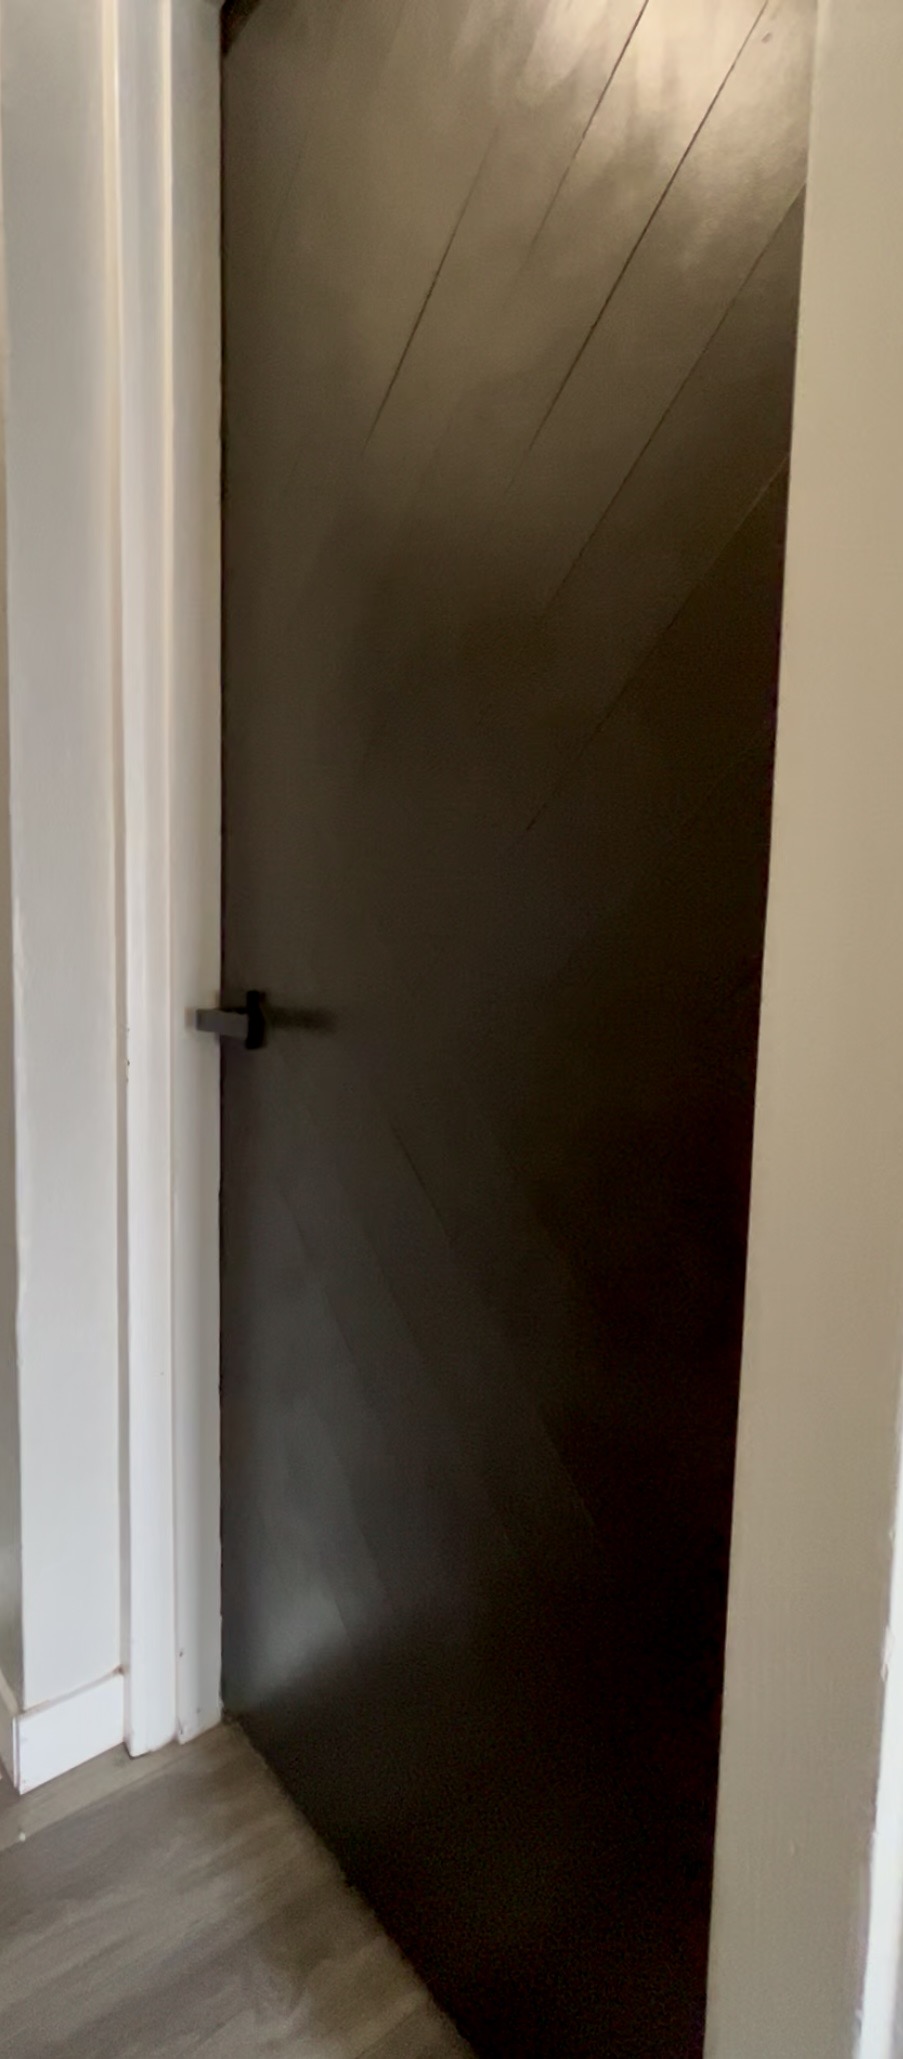
And that’s probably my favorite thing about this project.
You don’t always need to rip something out and replace it to completely change the way a space feels.
Sometimes the ugly or boring thing that’s already there just needs a little more work.
Or, in this case, some hardboard and some paint.
What I’d Keep in Mind If You’re Trying This
- Lay out the entire pattern first. The design is much easier to adjust while everything is still loose.
- Don’t rush the prep work. Filling, sanding, and cleaning are what make the finished door look intentional.
- Make the design your own. This same basic technique could be used to make vertical paneling, simple rectangles, diamonds, chevrons, or an entirely different geometric pattern.
Is It Worth Transforming an Old Door?
For me, absolutely.
Replacing a perfectly functional door just because it was boring didn’t make much sense when I could use the existing one as the base for something custom.
It’s exactly the kind of project I love: taking something that’s already here, putting in a little work, and ending up with something that feels completely different.
Worth the Dust? I’d say yes.
More projects are always in the works
Follow Worth the Dust for more DIY projects, renovations, and questionable decisions involving power tools.